Save
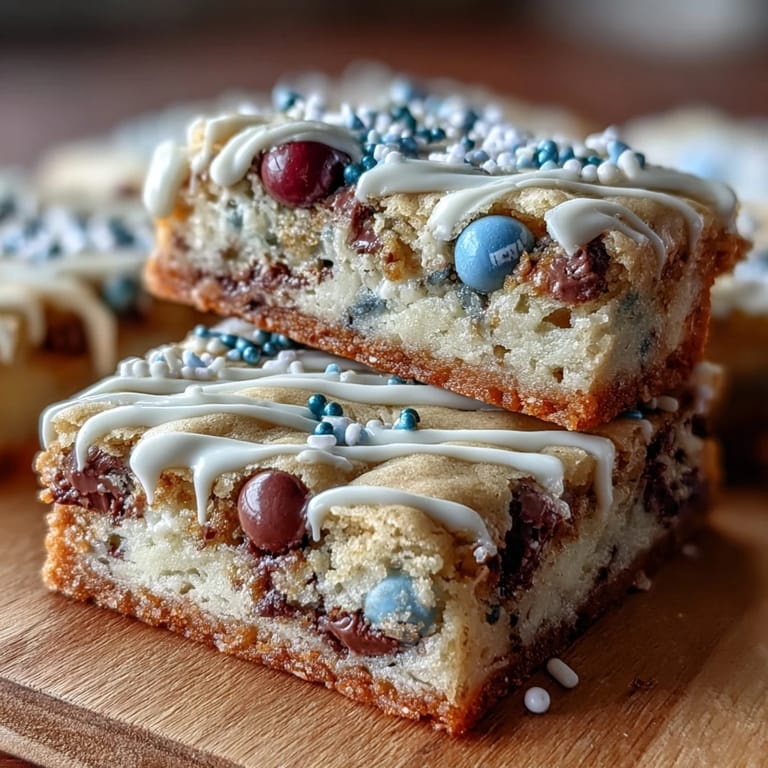
Save My cousin texted me three weeks before graduation asking if I could bring something to celebrate, and I immediately thought of these cookie bars. There's something about baking that feels like the right response to big life moments, you know? I'd made them once before for a friend's promotion party, and watching everyone grab multiple pieces told me everything I needed to know. The combination of chewy dough, chocolate bursts, and that silky white chocolate drizzle just works, especially when you can dress them up in school colors to make it personal.
I'll never forget pulling these bars out of the oven during my niece's graduation open house, and the smell hit everyone the moment they walked through the door. My mom actually abandoned her post at the punch bowl to come hover near the cooling rack, which told me everything. By the end of the afternoon, only crumbs remained, and three people asked for the recipe.
Ingredients
- All-purpose flour (2 1/4 cups): The foundation that keeps these bars chewy rather than cakey, so don't skip the weight measurement if you have a scale.
- Baking soda (1 tsp): This is your secret to that perfect golden edge while the center stays soft and tender.
- Salt (1/2 tsp): A tiny amount that makes the chocolate taste deeper and richer than you'd expect.
- Unsalted butter (1 cup, melted): Let it cool slightly so it doesn't cook the eggs when you mix it in, which I learned the hard way the first time.
- Brown sugar (1 cup packed) and granulated sugar (1/2 cup): The brown sugar gives moisture and chewiness while the white sugar adds crunch at the edges.
- Eggs (2 large): They bind everything together and create that tender crumb that makes people come back for seconds.
- Vanilla extract (2 tsp): Use pure vanilla, not imitation, and you'll taste the difference in every bite.
- Semi-sweet chocolate chips (1 cup): The reliable choice that melts beautifully without overpowering the other flavors.
- Colored candy-coated chocolates (1/2 cup): These are your celebration confetti, so pick colors that matter to your occasion and don't worry about them melting slightly into the dough.
- White chocolate (4 oz): Chop it yourself if possible, as it melts more evenly than chips.
- Vegetable oil (1 tsp): This keeps the white chocolate smooth and drizzleable instead of thick and clumpy.
Tired of Takeout? 🥡
Get 10 meals you can make faster than delivery arrives. Seriously.
One email. No spam. Unsubscribe anytime.
Instructions
- Set yourself up for success:
- Preheat your oven to 350°F and line a 9x13-inch pan with parchment paper, letting the edges hang over the sides so you can easily lift the whole thing out later. This step takes 30 seconds and saves you from frantically trying to pry bars out of the pan with a spatula.
- Whisk your dry team:
- In a medium bowl, combine flour, baking soda, and salt, making sure there are no lumps hiding in the corners. Set this aside and trust that you'll use it soon.
- Cream your wet mixture:
- In a large bowl, whisk together your cooled melted butter and both sugars until the mixture looks smooth and a little shiny, then add eggs and vanilla and mix until everything is combined. You're not trying to beat air into this like a cake batter, just make sure nothing streaky remains.
- Bring it all together gently:
- Fold the dry ingredients into the wet mixture slowly, stirring just until you don't see flour anymore, which should take about a minute. Overmixing develops gluten and makes the bars tough instead of tender, so resist the urge to go wild with the spatula.
- Scatter your celebration:
- Stir in the chocolate chips and colored candies, watching how they get distributed throughout the dough. This is the moment it starts feeling like a party.
- Spread and bake:
- Pour the dough into your prepared pan and spread it evenly with a spatula, then slide it into the oven for 23 to 25 minutes until the edges turn golden and a toothpick inserted in the center comes out with just a few moist crumbs clinging to it. The center should jiggle slightly when you gently shake the pan, which means it's cooked through but still chewy.
- Let patience do its work:
- Cool the bars completely in the pan on a wire rack, which takes about 30 minutes but is crucial because warm bars fall apart when you cut them. Go do something else, drink some coffee, breathe.
- Make your white chocolate magic:
- Chop or measure your white chocolate and place it in a microwave-safe bowl with the vegetable oil, then microwave in 20-second bursts, stirring between each one until it's completely smooth and glossy. White chocolate burns easily, so those short bursts matter more than you might think.
- Drizzle with intention:
- Using a spoon or a piping bag, drizzle the melted white chocolate across the cooled bars in whatever pattern makes you happy, then sprinkle with colored sprinkles if you want that extra celebration energy. The drizzle hardens in about 10 minutes at room temperature, faster if you have a patient freezer.
- Cut and celebrate:
- Once the white chocolate has set, use the parchment paper overhang to lift the entire slab out of the pan and place it on a cutting board. Cut into 16 squares using a sharp knife, wiping it clean between cuts for neat edges.
 Save
Save There's a moment during celebrations when you realize a dessert has become part of the memory, and these bars do that. People don't just eat them and move on, they linger to ask questions and plan to make them for their own occasions.
Why White Chocolate Makes All the Difference
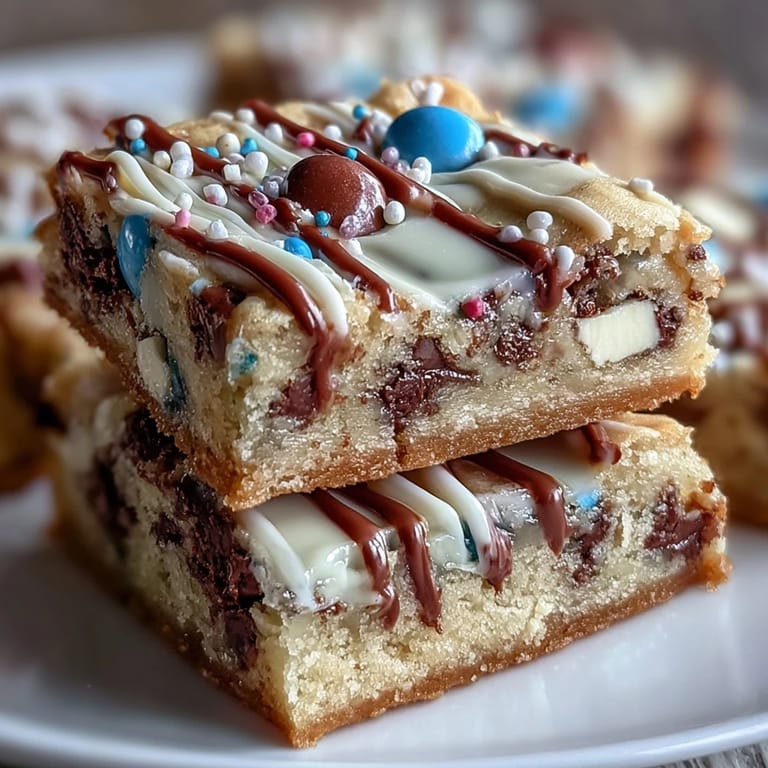
I used to make these bars without any drizzle at all, thinking the chocolate chips were enough, but adding that creamy white chocolate layer transformed them from simple to elegant. The drizzle catches the light and gives the impression you spent hours decorating when really you spent five minutes. It also adds a subtle sweetness that balances the semi-sweet chips and keeps people reaching for just one more bite.
Making Them Your Own with Colors
The beauty of this recipe is that it's a blank canvas for celebrating whoever and whatever you want. I've made them for graduations in blue and gold, for a school rivalry game in red and white, and even in rainbow colors for a pride party. The colored candies aren't just decoration, they signal that someone thought about who they were baking for, which means more than perfect precision ever could.
Storage and Make-Ahead Magic
These bars actually taste better the next day once the flavors have settled and the texture has firmed up slightly, which makes them perfect for baking ahead of a big event. Store them in an airtight container at room temperature for up to four days, though in my experience they rarely last that long once people know they exist.
- You can even freeze the baked bars before adding the white chocolate drizzle if you're planning several days ahead.
- Let them thaw at room temperature for an hour before adding the drizzle so the bars don't sweat.
- The parchment paper overhang method is your secret weapon for removing them intact every single time.
 Save
Save These bars have become my go-to celebration dessert because they're reliable, customizable, and genuinely delicious. Bake them once and you'll understand why they show up at every major moment in my kitchen.