 Save
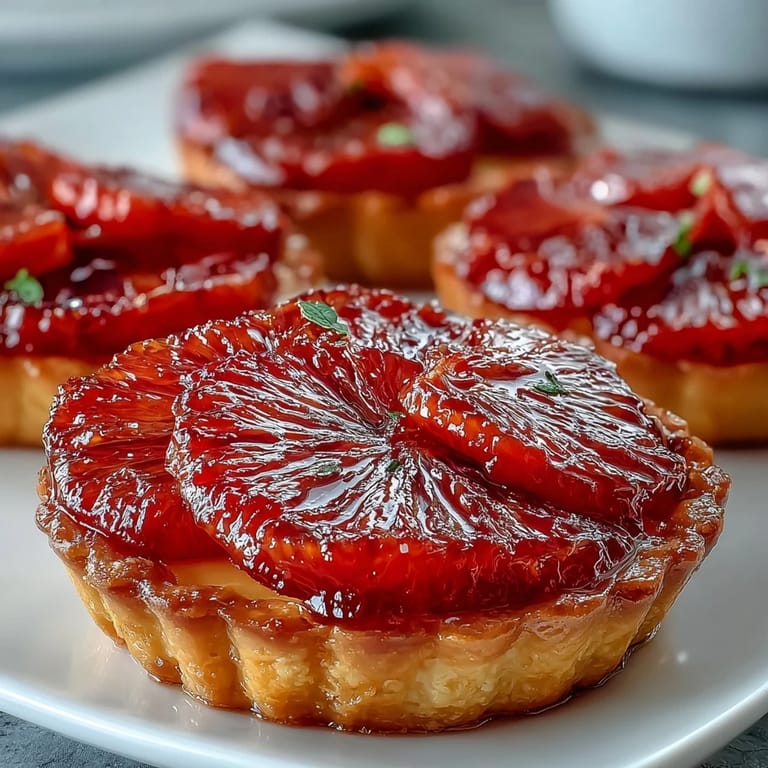
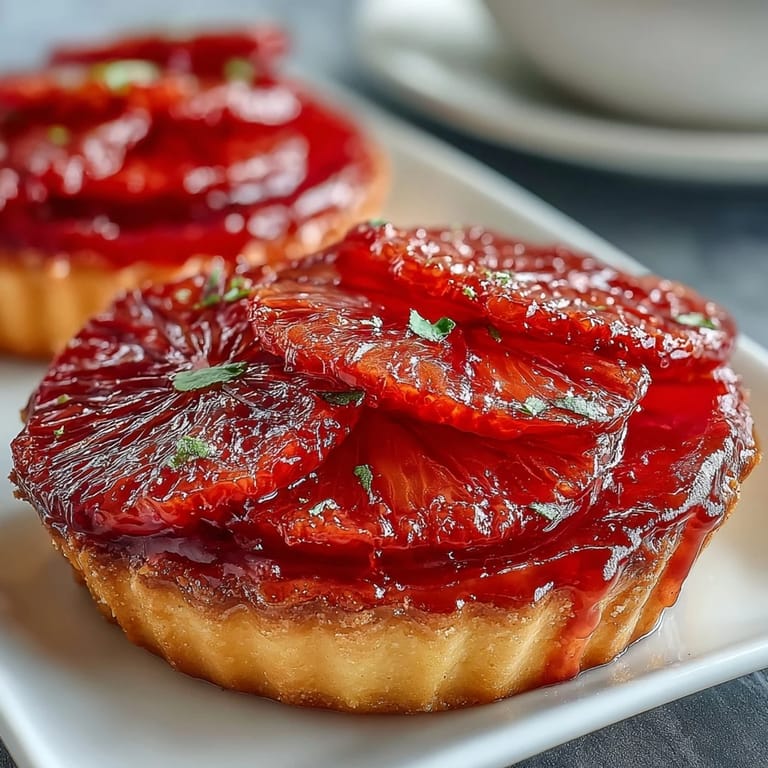
Save The morning light hit the blood oranges on my counter and I knew I had to do something special with them. Their deep magenta flesh was too beautiful to just squeeze into juice. I'd been wanting to try individual tarts for weeks, something elegant but not fussy, and suddenly the whole dessert came together in my mind. Within an hour, I had dough chilling and was already planning who I'd invite over to help me eat six of these.
I made these for a small dinner party on a rainy February evening. Everyone went quiet after the first bite, which is always the best compliment. My friend Sarah, who usually skips dessert, ate hers slowly and asked if she could take a second one home. That night, these tarts stopped being just an experiment and became something I knew I'd make again and again.
Ingredients
- All-purpose flour: The base of your tart shell, keeping the butter cold while you work with it makes all the difference in getting that crisp, flaky texture.
- Powdered sugar: It dissolves more smoothly into the dough than granulated and gives a tender, melt-in-your-mouth crust.
- Unsalted butter (cold and cubed): Cold butter creates those beautiful flaky layers, so pop it back in the fridge if your kitchen is warm.
- Egg yolk: Adds richness and helps bind the dough without making it tough.
- Ice water: Just enough to bring the dough together, add it slowly so you don't overdo it.
- Whole milk: The foundation of a smooth custard, whole milk gives the best creamy texture without being too heavy.
- Granulated sugar: Sweetens the custard and helps it set up nicely when combined with the cornstarch.
- Egg yolks (for custard): These make the custard rich and luxurious, whisk them well to avoid any lumps.
- Cornstarch: Your thickening agent that works faster and more reliably than flour in custards.
- Pure vanilla extract: A must for depth, the real stuff makes a noticeable difference here.
- Unsalted butter (for custard): Whisked in at the end, it gives the custard a beautiful sheen and extra silkiness.
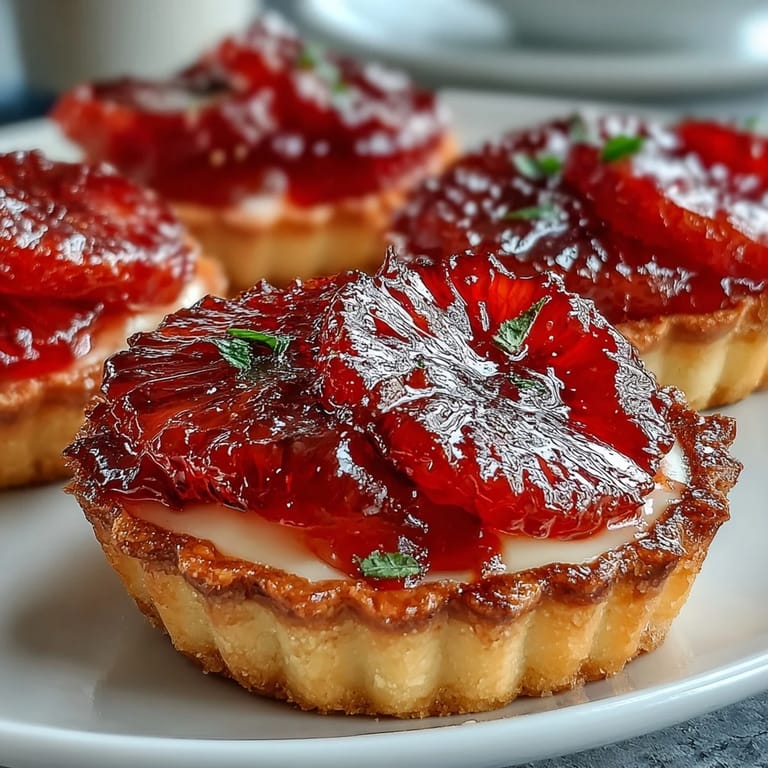
- Blood oranges: The star of the show, their ruby color and sweet-tart flavor are what make these tarts unforgettable.
- Honey (optional): A light glaze adds shine and a hint of floral sweetness that complements the citrus.
Tired of Takeout? 🥡
Get 10 meals you can make faster than delivery arrives. Seriously.
One email. No spam. Unsubscribe anytime.
Instructions
- Make the tart dough:
- Pulse the flour, powdered sugar, and salt in your food processor, then add the cold butter cubes and pulse until it looks like wet sand. Add the egg yolk and drizzle in ice water just until the dough starts to clump together.
- Chill the dough:
- Press it into a flat disk, wrap it tightly in plastic, and let it rest in the fridge for at least an hour. This relaxes the gluten and makes rolling so much easier.
- Roll and shape:
- On a floured surface, roll the dough thin and cut circles to fit your tart pans, pressing gently into the corners. Pop them back in the fridge for 20 minutes so they hold their shape when baking.
- Blind bake the shells:
- Line each shell with parchment, fill with pie weights or dried beans, and bake at 350°F for 15 minutes. Remove the weights and bake another 5 minutes until golden and crisp.
- Prepare the custard:
- Heat the milk until steaming, then whisk your egg yolks, sugar, and cornstarch in a bowl until pale and thick. Slowly pour in the hot milk while whisking, then return everything to the pan and cook, stirring constantly, until it bubbles and thickens.
- Finish and cool the custard:
- Off the heat, stir in vanilla and butter until smooth. Press plastic wrap directly onto the surface to prevent a skin, and chill until completely cold.
- Assemble the tarts:
- Spoon the chilled custard into your cooled shells and smooth the tops. Arrange thin slices of blood orange in overlapping circles on top.
- Glaze and serve:
- If you want that professional shine, warm honey with a teaspoon of water and brush it gently over the oranges. Chill until you're ready to serve.
 Save
Save There's something about slicing into a tart and seeing those vivid orange layers that makes people smile before they even taste it. I've served these at brunches, after dinner, even brought them to a potluck where they completely stole the show. They're proof that a little extra effort in presentation turns a simple dessert into a memory.
Choosing Your Blood Oranges
Look for fruit that feels heavy for its size and has a slight give when you press gently. The skin might have a reddish blush, but it's the inside that counts. I slice one open at the store if I can, because the color can vary wildly from pale pink to deep crimson. The darkest ones are the most dramatic on top of these tarts, but even the lighter varieties taste wonderful.
Make-Ahead Strategy
I bake the shells up to two days ahead and keep them in an airtight container at room temperature. The custard can sit in the fridge for a day, but I wait to assemble until a few hours before serving. Once you top them with the oranges, they start to soften the custard slightly, which is fine for a few hours but not overnight. If you're organized, you can have everything ready and just spend five minutes assembling right before guests arrive.
Variations and Swaps
When blood oranges aren't in season, regular navel or cara cara oranges work beautifully. I've also used a mix of citrus, thin grapefruit slices with orange, which adds a nice bitterness. For a different flavor, fold a tablespoon of orange liqueur into the custard or add some finely grated zest.
- Try lemon curd instead of vanilla custard for a tangier filling.
- A sprinkle of crushed pistachios on top adds color and crunch.
- Swap the honey glaze for a light dusting of powdered sugar if you prefer.
 Save
Save These tarts have become my go-to when I want to impress without the stress. They're as lovely to look at as they are to eat, and every time I make them, I'm reminded why I fell in love with baking in the first place.
Recipe FAQs
- → Can I make these tarts ahead of time?
Yes, you can prepare the tart shells and custard up to one day in advance. Store them separately in the refrigerator and assemble with fresh blood orange slices just before serving to maintain the best texture and presentation.
- → What can I substitute for blood oranges?
Regular oranges, Cara Cara oranges, or even grapefruit segments work well as substitutes. While you'll lose the distinctive red color, the flavor and texture will still be delicious.
- → How do I prevent the tart shells from shrinking?
Chilling the dough twice—once after making it and again after pressing it into the pans—helps minimize shrinkage. Also, avoid stretching the dough when fitting it into the tart pans.
- → Can I use store-bought tart shells?
Absolutely. Pre-made tart shells save time and still yield delicious results. Just fill them with homemade custard and top with blood oranges for an easier version of this dessert.
- → How long will these tarts keep?
Once assembled, these tarts are best enjoyed within 24 hours. The custard-filled tarts can become soggy if stored longer. Keep them refrigerated and covered until serving.
- → Do I need special equipment for this dessert?
Individual 4-inch tart pans with removable bottoms work best, but you can also use a single 9-inch tart pan. A food processor makes the dough easier, though you can also mix it by hand using a pastry cutter.