 Save
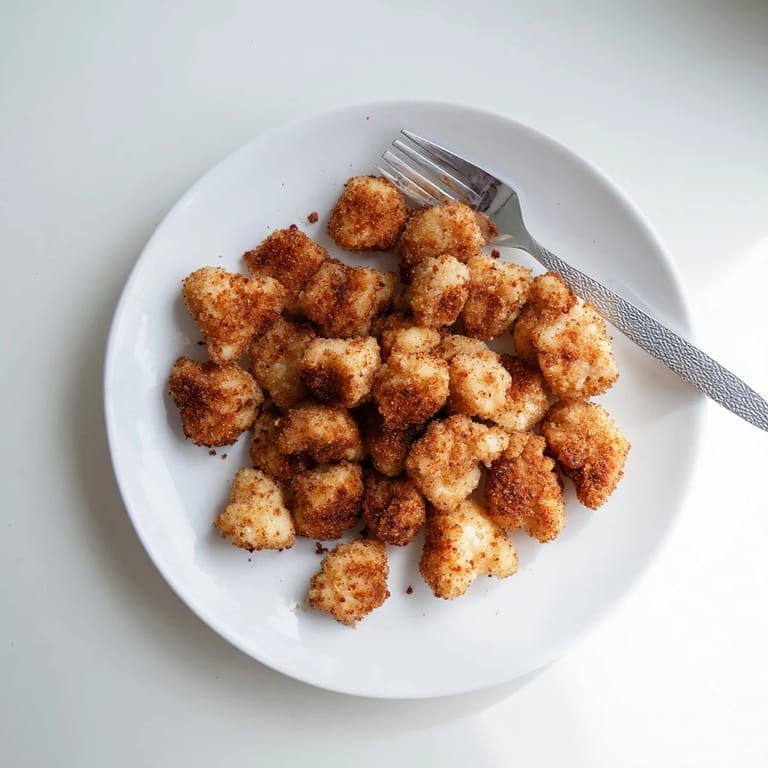
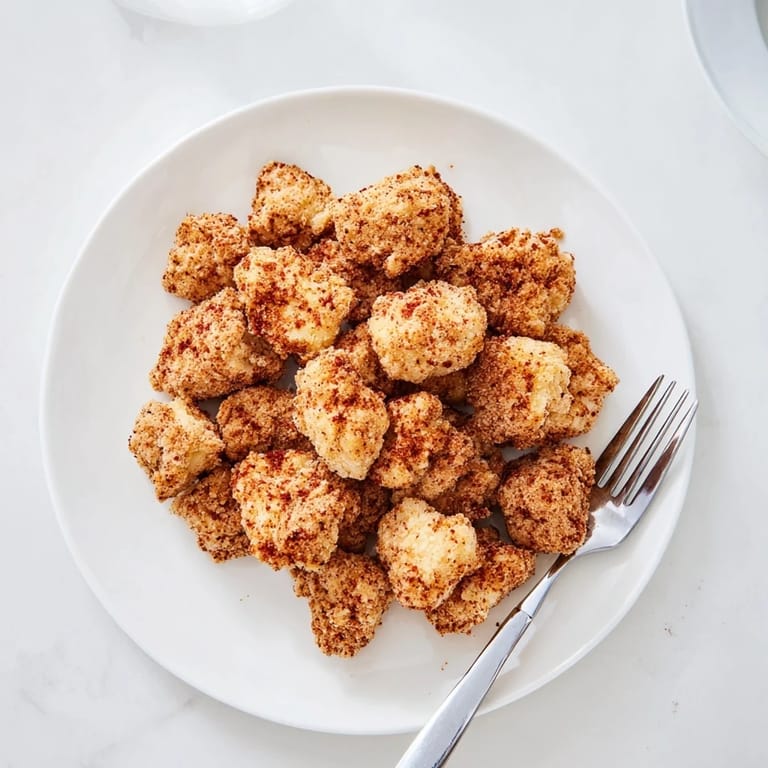
Save The smell of frying chicken hits me before I even walk into the kitchen. My roommate had decided to make popcorn chicken at midnight on a Tuesday, and the entire apartment smelled like heaven. We ended up sitting on the kitchen floor, eating pieces straight from the cooling rack, burning our fingers and not caring one bit. That impromptu snack session turned into a regular tradition whenever life felt overwhelming.
I once made three batches for a Super Bowl party and watched people pass up the takeout wings for these homemade nuggets. The kitchen became command central, with friends hovering around the fryer, stealing samples as fast as I could cook them. Now whenever I hear oil bubbling on the stove, I think of laughter, crowded countertops, and the way good food pulls people together.
Ingredients
- Chicken: Thighs stay juicier than breast meat, but either works perfectly as long as you cut them into consistent bite-sized pieces
- Buttermilk: The acidity tenderizes the meat while creating the perfect adhesive surface for the breading to cling to
- Cornstarch: This secret ingredient creates that extra crunch that makes restaurant fried food so addictive
- Baking powder: Tiny bubbles form in the coating during frying, giving you that light, airy texture
- Paprika: Adds subtle earthiness and helps achieve that gorgeous golden brown color everyone loves
- Cayenne pepper: Just enough warmth to make these interesting without overwhelming people who shy away from heat
Tired of Takeout? 🥡
Get 10 meals you can make faster than delivery arrives. Seriously.
One email. No spam. Unsubscribe anytime.
Instructions
- Let the chicken soak:
- Toss your cut pieces in the buttermilk mixture and forget about them for at least 30 minutes, though overnight in the fridge makes them even better
- Whisk up the coating:
- Combine the flour, cornstarch, baking powder, and spices in a wide bowl until everything is evenly distributed
- Get your oil ready:
- Heat your oil to 180°C (350°F) and test it with a tiny piece of bread—it should sizzle immediately and float to the top
- Coat for maximum crunch:
- Dredge each piece thoroughly in the flour mixture, then dip it back into the buttermilk and coat again for that satisfying thick crust
- Fry in batches:
- Cook the chicken for 3 to 4 minutes until deep golden brown, never overcrowding the pot or the oil temperature will drop too much
- Drain properly:
- Set the finished pieces on a wire rack instead of paper towels so steam escapes and the bottom stays crispy
 Save
Save My niece helped me make these last summer, standing on a chair at the stove with her hair tied back in a messy bun. She took her coating duties so seriously, carefully turning each piece until it was completely covered in flour. The pride on her face when everyone raved about her chicken at dinner was absolutely worth the mess we made of the kitchen.
Perfecting The Double Coat
The first time I tried double coating, I thought it seemed excessive and messy. Then I took that first bite and understood why fast food places do it. The extra layer creates such a substantial crunch that you hear it when you bite down, and it protects the juicy meat inside even as the chicken cools on the table during a long movie marathon.
Oil Temperature Secrets
I ruined my first few batches by frying at too low a temperature, resulting in greasy, soggy coating that fell off in pieces. Investing in a cheap kitchen thermometer changed everything. Now I maintain that 180°C (350°F) religiously, and the difference is night and day. The crust forms almost instantly, sealing in moisture while staying incredibly light and crisp.
Serving Ideas That Work
These disappear fastest when I set up a DIY sauce bar with small bowls of ranch, honey mustard, and spicy mayo. I once served them in mini paper cones at a casual dinner party, and people kept wandering back to the kitchen for refills all evening.
- Keep the finished chicken warm in a 200°F oven if you are frying multiple batches
- Sprinkle with flaky sea salt immediately after frying for a restaurant finish
- Double the recipe because these vanish faster than you expect
 Save
Save There is something deeply satisfying about making fast food favorites at home, where you control everything and the results are infinitely better. These popcorn chickens have become my go-to for comfort food cravings.
Recipe FAQs
- → How do I get extra crispy popcorn chicken?
Double coat your chicken by dipping it back into the buttermilk after the first flour coating, then coat again. This creates a thicker, crunchier crust that stays crispy longer.
- → Can I bake popcorn chicken instead of frying?
Yes, arrange coated chicken on a baking sheet, spray with oil, and bake at 200°C (400°F) for 20-25 minutes, flipping halfway. The texture will be different but still delicious.
- → How long should I marinate the chicken?
Marinate for at least 30 minutes, but up to 4 hours in the refrigerator. Longer marinating time results in more flavorful and tender chicken.
- → What oil temperature is best for frying?
Maintain oil at 180°C (350°F). Use a thermometer to ensure proper temperature—too cool results in greasy chicken, too hot burns the coating before the meat cooks.
- → What dipping sauces work well?
Classic options include ranch dressing, honey mustard, barbecue sauce, or sweet chili sauce. For a spicy kick, try sriracha mayo or buffalo sauce.